> For the complete documentation index, see [llms.txt](https://docs.enclaive.cloud/vault/llms.txt). Markdown versions of documentation pages are available by appending `.md` to page URLs; this page is available as [Markdown](https://docs.enclaive.cloud/vault/tutorials/use-cases/github-actions.md).
# GitHub Actions
[GitHub Actions](https://github.com/features/actions) enable you automate workflows for your GitHub hosted repositories. The workflows that build, test, and deploy your code may require secrets to achieve their goal. The [Vault GitHub action](https://github.com/marketplace/actions/hashicorp-vault) gives you the ability to pull secrets from Vault.
### Challenge
A GitHub repository maintains a web application that requires a Docker image. The image requires the injection of secrets that you have stored in Vault. The process is typically handled either manually, or through a continuous integration (CI) service. The process requires human intervention and does not offer rich feedback alongside the GitHub repository.
### Solution
Define a GitHub workflow within your repository and request the required secrets with Vault GitHub actions.
### Prerequisites
This tutorial requires Vault, git, Docker, a GitHub account, and the sample web application.
Retrieve the web application and additional configuration by cloning the [hashicorp-education/learn-github-actions ](https://github.com/hashicorp-education/learn-vault-github-actions)repository from GitHub.
```shell-session
$ git clone https://github.com/hashicorp-education/learn-vault-github-actions.git
```
This repository holds supporting content for Vault learn tutorials. You can find the content for this hands on lab in a subdirectory.
Change into the `learn-vault-github-actions/vault-github-action` directory.
```shell-session
$ cd learn-vault-github-actions/vault-github-action
```
{% hint style="warning" %}
Working directory
You should execute commands for the rest of the tutorial from this directory.
{% endhint %}
#### Create Docker image
Create a Docker image for the application and label it `vault-action-exampleapp`.
```shell-session
$ docker build . --file Dockerfile -t vault-action-exampleapp
```
Docker builds the image and pushes it to your local Docker repository. During image creation a default application secret gets stored in the application root, in a file named `app_secret`.
View the contents of the `app_secret` file in the Docker image.
```shell-session
$ docker run vault-action-exampleapp /bin/bash -c "cat ./app_secret"
UNSET_SECRET_PLEASE_OVERRIDE
```
The contents of the file show that the file used the default value during creation. Now, you are ready to automate the image build process while overriding the secret.
### Start Vault
Vault can manage the secrets required for this application. A Vault server run in development mode automatically initializes, unseals, and enables the key-value secrets engine.
1. In **another terminal**, start a Vault dev server with `root` as the root token.
```shell-session
$ vault server -dev -dev-root-token-id root
```
The Vault dev server defaults to running at `127.0.0.1:8200`. A dev mode server automatically initializes and unseals itself at startup.
{% hint style="danger" %}
Insecure operation
Do not run a Vault dev server in production. You use a dev mode server in this tutorial just to simplify the unsealing process for this hands on lab.
{% endhint %}
2. Export an environment variable for the `vault` CLI to address the Vault server.
```shell-session
$ export VAULT_ADDR=http://127.0.0.1:8200
```
3. Export an environment variable for the `vault` CLI to authenticate with the Vault server.
```shell-session
$ export VAULT_TOKEN=root
```
The Vault server is ready to have a secret added.
#### Create a secret
The GitHub workflow deployed later reads a secret defined at `secret/data/ci`. You need to create this secret, a policy defined to access the secret, and a token generated to retrieve the secret.
If you use Vault UI, you can enable the KV secret engine:
 1. Create the secret at the path `secret/ci` with an `app_secret` key.
```shell-session
$ vault kv put secret/ci app_secret=SecretProvidedByVault
```
2. Verify that the secret exists at the path `secret/ci`.
```shell-session
$ vault kv get secret/ci
```
You created the secret.
3. Write a policy that grants the read capability for the secret path.
```shell-session
$ vault policy write ci-secret-reader - <
You can define GitHub actions for a repository. [Create a new repository](https://docs.github.com/en/free-pro-team@latest/github/getting-started-with-github/create-a-repo) associated with your user account or a GitHub organization.
#### Create a GitHub repository
1. Initialize the current directory as a git repository
```shell-session
$ git init
```
2. Stage all files to commit.
```shell-session
$ git add .
```
3. Commit all staged files.
```shell-session
$ git commit -m "Initial Commit"
```
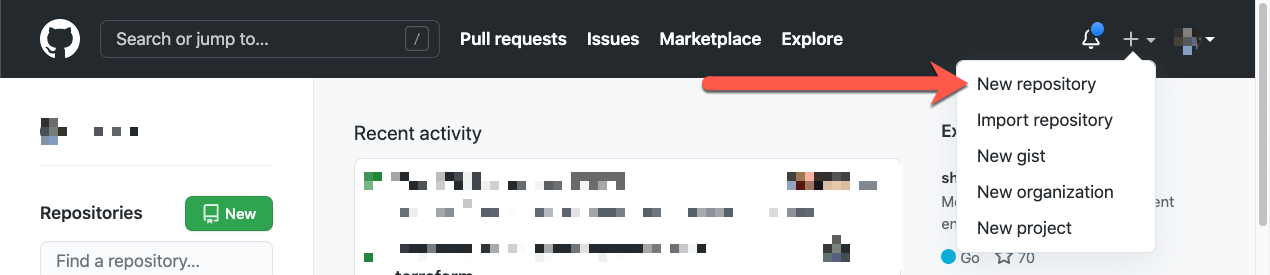
4. On GitHub, in the upper-right corner of any page, use the **+** (plus) drop-down menu, and select **New repository**.
1. Create the secret at the path `secret/ci` with an `app_secret` key.
```shell-session
$ vault kv put secret/ci app_secret=SecretProvidedByVault
```
2. Verify that the secret exists at the path `secret/ci`.
```shell-session
$ vault kv get secret/ci
```
You created the secret.
3. Write a policy that grants the read capability for the secret path.
```shell-session
$ vault policy write ci-secret-reader - <
You can define GitHub actions for a repository. [Create a new repository](https://docs.github.com/en/free-pro-team@latest/github/getting-started-with-github/create-a-repo) associated with your user account or a GitHub organization.
#### Create a GitHub repository
1. Initialize the current directory as a git repository
```shell-session
$ git init
```
2. Stage all files to commit.
```shell-session
$ git add .
```
3. Commit all staged files.
```shell-session
$ git commit -m "Initial Commit"
```
4. On GitHub, in the upper-right corner of any page, use the **+** (plus) drop-down menu, and select **New repository**.
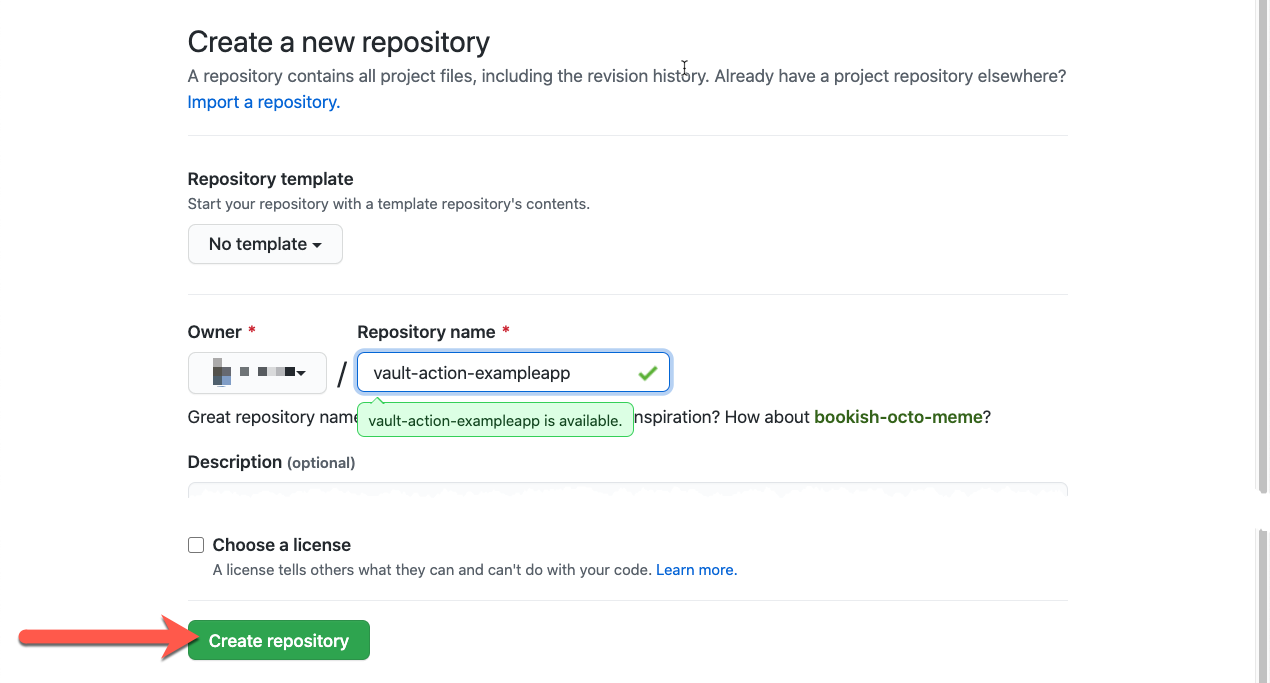
 5. Name your repository "vault-action-exampleapp"
6. Click **Create repository**.
The view changes to show you the main page of the repository.
5. Name your repository "vault-action-exampleapp"
6. Click **Create repository**.
The view changes to show you the main page of the repository.
 7. Follow the instructions from the **…or push an existing repository from the command line** section. Return to the terminal and paste those commands.
```shell-session
$ git remote add origin https://github.com//vault-action-exampleapp.git
$ git branch -M main
$ git push -u origin main
```
#### Setup Vault auth credentials with the repository
The GitHub self-hosted runner requires a token for it to authenticate with the Vault server. This token value gets defined as a repository [secret](https://docs.github.com/en/free-pro-team@latest/actions/reference/encrypted-secrets#creating-encrypted-secrets-for-a-repository).
{% hint style="info" %}
More auth methods
The Vault GitHub Action supports several different [authentication](https://github.com/marketplace/actions/hashicorp-vault#authentication-method) methods.
{% endhint %}
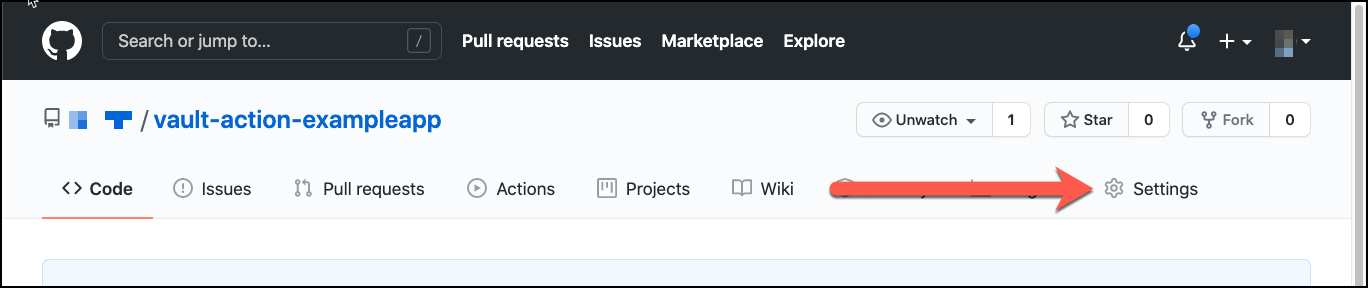
1. On GitHub, navigate to the main page of the repository.
2. Under your repository name, click **Settings**.
7. Follow the instructions from the **…or push an existing repository from the command line** section. Return to the terminal and paste those commands.
```shell-session
$ git remote add origin https://github.com//vault-action-exampleapp.git
$ git branch -M main
$ git push -u origin main
```
#### Setup Vault auth credentials with the repository
The GitHub self-hosted runner requires a token for it to authenticate with the Vault server. This token value gets defined as a repository [secret](https://docs.github.com/en/free-pro-team@latest/actions/reference/encrypted-secrets#creating-encrypted-secrets-for-a-repository).
{% hint style="info" %}
More auth methods
The Vault GitHub Action supports several different [authentication](https://github.com/marketplace/actions/hashicorp-vault#authentication-method) methods.
{% endhint %}
1. On GitHub, navigate to the main page of the repository.
2. Under your repository name, click **Settings**.
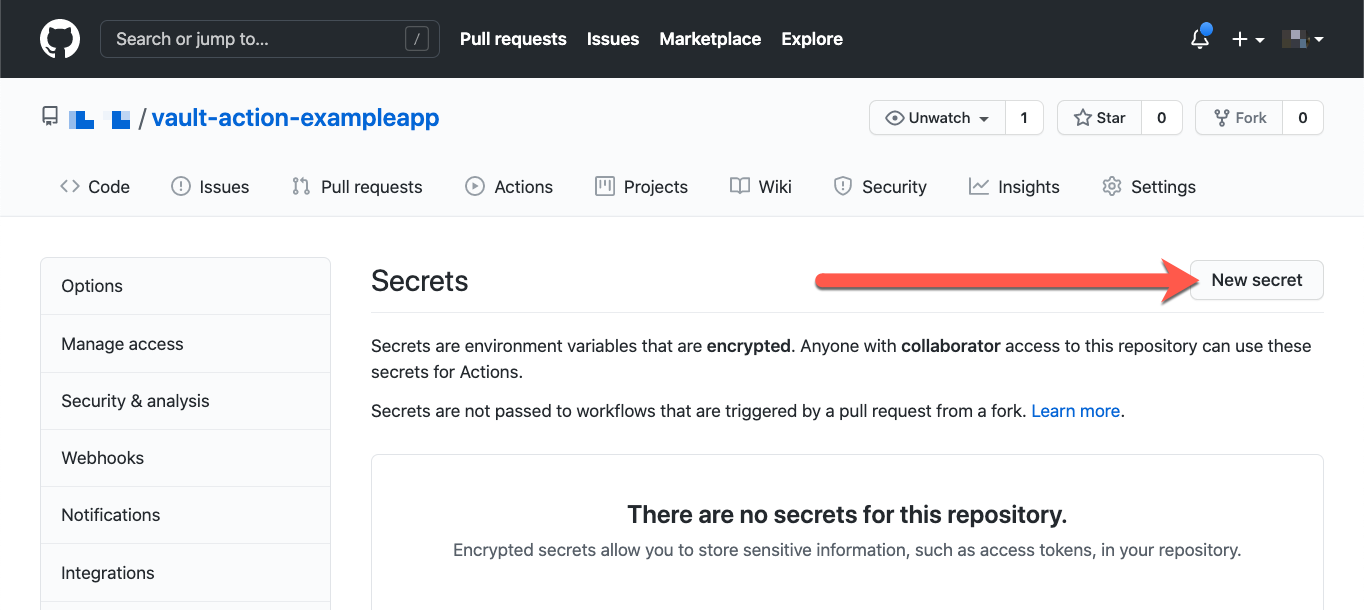
 3. In the left sidebar, click **Secrets**.
 4. Click **New secret**.
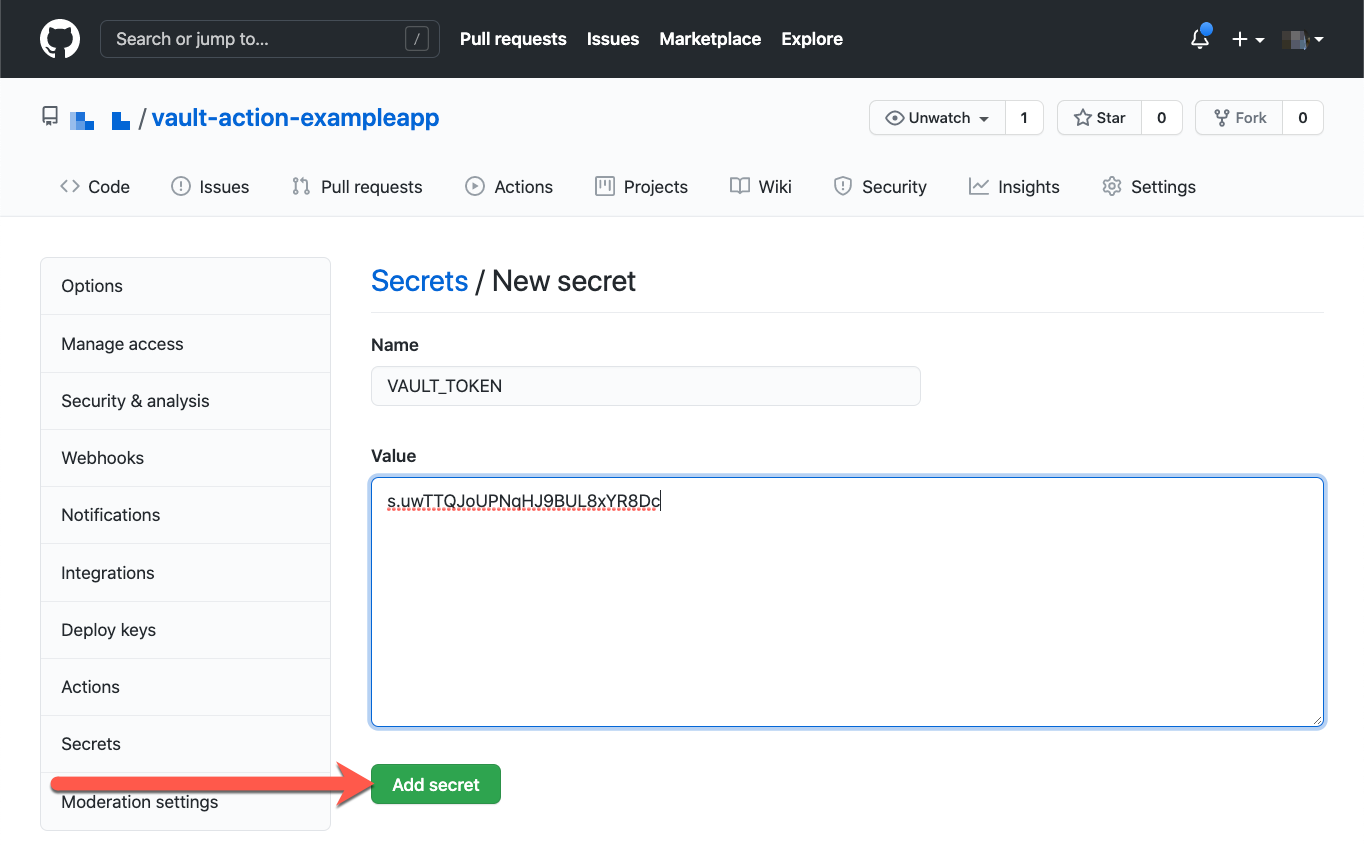
 5. Enter the name `VAULT_TOKEN` for your secret in the **Name** input box.
6. From the terminal, copy the token stored in the variable `GITHUB_REPO_TOKEN`
```shell-session
$ echo $GITHUB_REPO_TOKEN | pbcopy
```
7. Paste the token as the value for the secret.
8. Click **Add secret**.
The view returns to the secrets index and displays the new secret in the list of secrets.
5. Enter the name `VAULT_TOKEN` for your secret in the **Name** input box.
6. From the terminal, copy the token stored in the variable `GITHUB_REPO_TOKEN`
```shell-session
$ echo $GITHUB_REPO_TOKEN | pbcopy
```
7. Paste the token as the value for the secret.
8. Click **Add secret**.
The view returns to the secrets index and displays the new secret in the list of secrets.
 You configured the GitHub repository with a token that is valid, and capable of reading the secret from the Vault server.
#### Setup the GitHub self-hosted runner
The GitHub [self-hosted](https://docs.github.com/en/free-pro-team@latest/actions/hosting-your-own-runners/about-self-hosted-runners) runner enables you to start a runner instance on an instance that you manage. You can use your workstation if it's [supported](https://docs.github.com/en/free-pro-team@latest/actions/hosting-your-own-runners/about-self-hosted-runners#supported-operating-systems-for-self-hosted-runners).
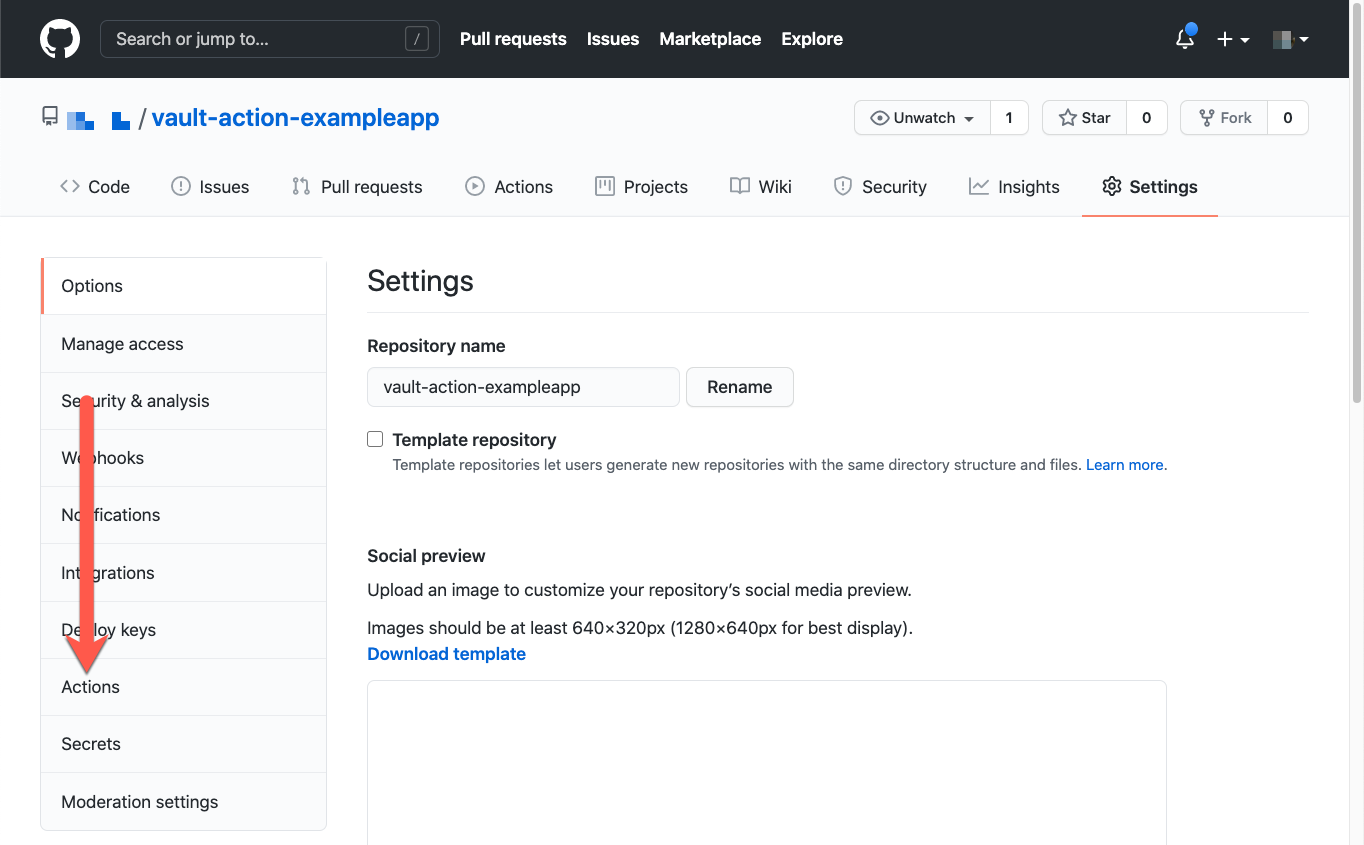
1. On GitHub, navigate to the main page of the repository.
2. Under your repository name, click **Settings**.
3. In the left sidebar, click **Actions**.
You configured the GitHub repository with a token that is valid, and capable of reading the secret from the Vault server.
#### Setup the GitHub self-hosted runner
The GitHub [self-hosted](https://docs.github.com/en/free-pro-team@latest/actions/hosting-your-own-runners/about-self-hosted-runners) runner enables you to start a runner instance on an instance that you manage. You can use your workstation if it's [supported](https://docs.github.com/en/free-pro-team@latest/actions/hosting-your-own-runners/about-self-hosted-runners#supported-operating-systems-for-self-hosted-runners).
1. On GitHub, navigate to the main page of the repository.
2. Under your repository name, click **Settings**.
3. In the left sidebar, click **Actions**.
 4. Under "Self-hosted runners," click **Add runner**.
 5. Select the operating system and architecture of your self-hosted runner machine.
6. Follow the instructions in the **Download** section.
This prepares a directory for the GitHub runner and then downloads the runner.
{% hint style="warning" %}
Warning
You can download and extract the runner within this tutorial directory, but **you should not check this code into your repository source** as it can contain sensitive information.
{% endhint %}
7. Follow the instructions in the **Configure** section.
This configures the runner to connect to GitHub with a token it generates for the runner.
#### Define a workflow for the GitHub action
GitHub actions express the operations that they carry out through workflows. These workflows can trigger based on different events that take place during the lifecycle of the source code in the repository. GitHub actions automatically create workflows when it detects a configuration file within the repository.
1. In a terminal, within the repository, create the directory `.github/workflows`.
```shell-session
$ mkdir -p .github/workflows
```
2. Create a workflow file named `image-builder.yml` within that directory that defines the name of the workflow and the trigger frequency.
```shell-session
$ tee .github/workflows/image-builder.yml <
The workflow triggers on every push to any branch of this repository.
1. Add the unstaged files.
```shell-session
$ git add .
```
2. Commit the staged changes.
```shell-session
$ git commit -m "adds workflow to repo"
```
3. Push these changes to the remote repository.
```shell-session
$ git push origin main
```
The GitHub self-hosted runner polls GitHub for changes, and executes the runner upon detecting changes.
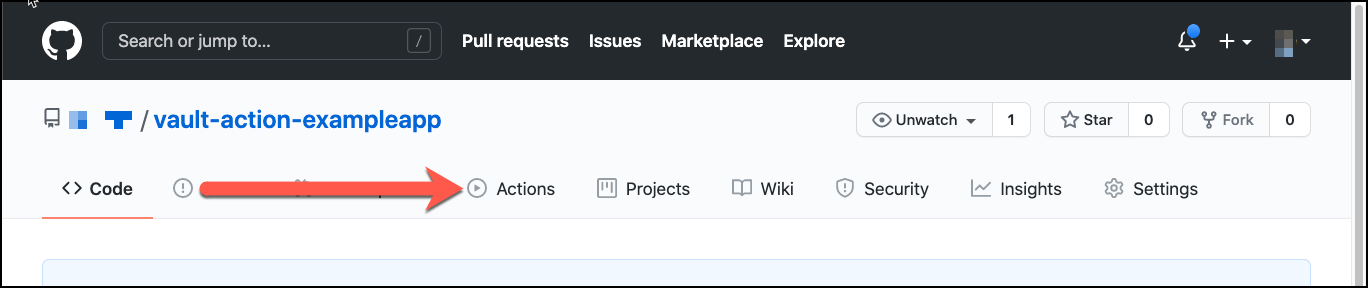
1. On GitHub, navigate to the main page of the repository.
2. Under your repository name, click **Actions**.
5. Select the operating system and architecture of your self-hosted runner machine.
6. Follow the instructions in the **Download** section.
This prepares a directory for the GitHub runner and then downloads the runner.
{% hint style="warning" %}
Warning
You can download and extract the runner within this tutorial directory, but **you should not check this code into your repository source** as it can contain sensitive information.
{% endhint %}
7. Follow the instructions in the **Configure** section.
This configures the runner to connect to GitHub with a token it generates for the runner.
#### Define a workflow for the GitHub action
GitHub actions express the operations that they carry out through workflows. These workflows can trigger based on different events that take place during the lifecycle of the source code in the repository. GitHub actions automatically create workflows when it detects a configuration file within the repository.
1. In a terminal, within the repository, create the directory `.github/workflows`.
```shell-session
$ mkdir -p .github/workflows
```
2. Create a workflow file named `image-builder.yml` within that directory that defines the name of the workflow and the trigger frequency.
```shell-session
$ tee .github/workflows/image-builder.yml <
The workflow triggers on every push to any branch of this repository.
1. Add the unstaged files.
```shell-session
$ git add .
```
2. Commit the staged changes.
```shell-session
$ git commit -m "adds workflow to repo"
```
3. Push these changes to the remote repository.
```shell-session
$ git push origin main
```
The GitHub self-hosted runner polls GitHub for changes, and executes the runner upon detecting changes.
1. On GitHub, navigate to the main page of the repository.
2. Under your repository name, click **Actions**.
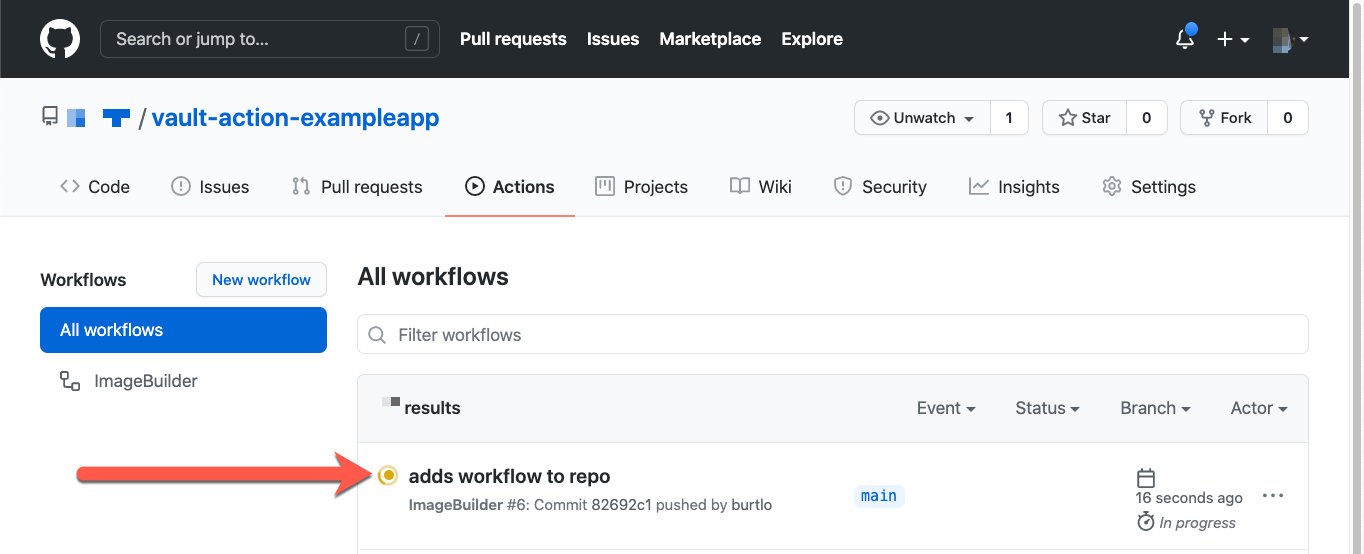
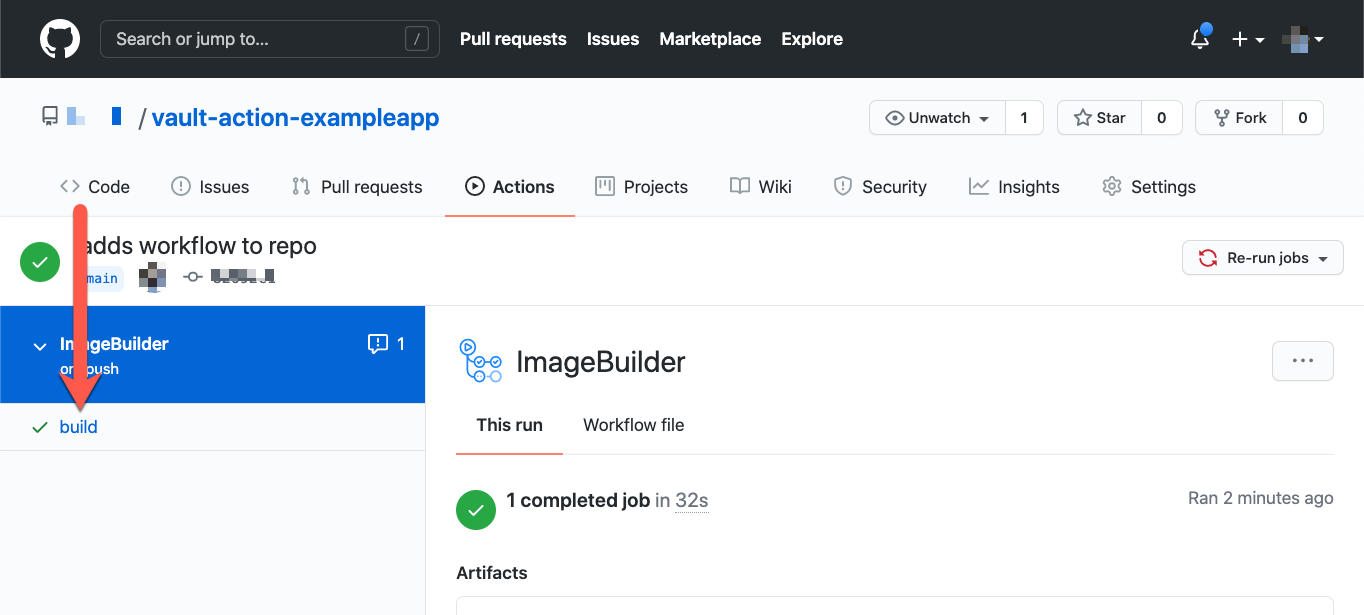
 3. Under "All workflows" click the result **adds workflow to repo**.
This view displays the execution of the workflow for this commit.
3. Under "All workflows" click the result **adds workflow to repo**.
This view displays the execution of the workflow for this commit.
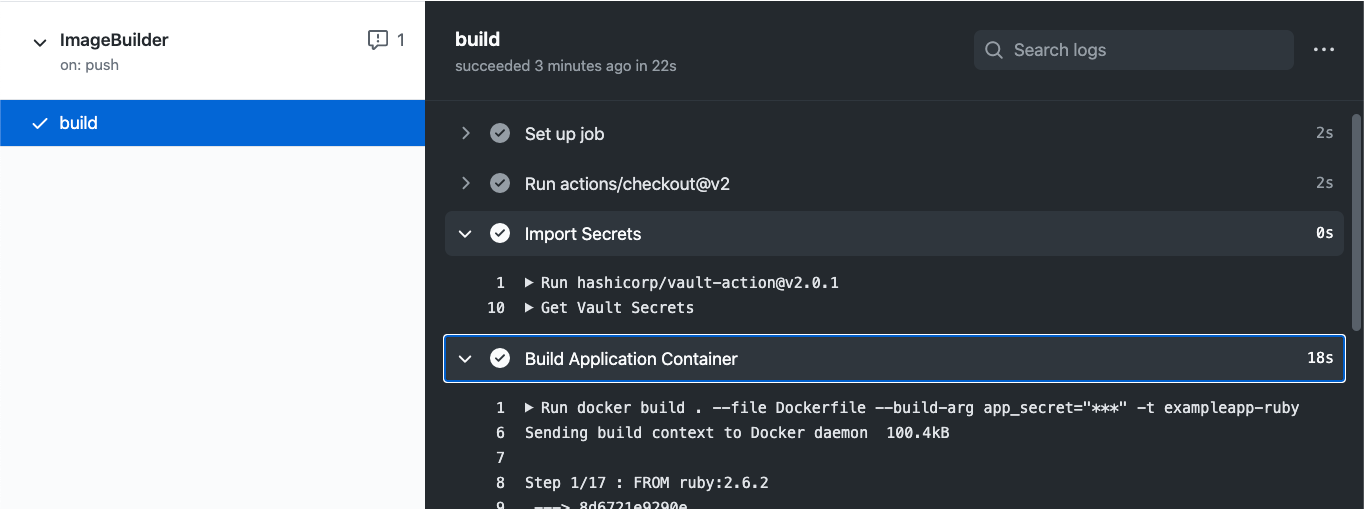
 4. Under the name of the workflow, click the **build** job.
This view displays the steps that took place for this job. Each step can be expanded to see progress, results, and errors.
Docker builds the image and stores it in the local Docker registry. The Docker image created a file named `app_secret` within the working directory and populated it with the Vault secret.
4. Under the name of the workflow, click the **build** job.
This view displays the steps that took place for this job. Each step can be expanded to see progress, results, and errors.
Docker builds the image and stores it in the local Docker registry. The Docker image created a file named `app_secret` within the working directory and populated it with the Vault secret.
 5. View the contents of the `app_secret` file in the Docker image.
```shell-session
$ docker run vault-action-exampleapp /bin/bash -c "cat ./app_secret"
SecretProvidedByVault
```
The results display the Vault secret defined at the path `secret/data/ci`. The application, and other services within this Docker image can use the secret.
---
# Agent Instructions
This documentation is published with GitBook. GitBook is the documentation platform designed so that both humans and AI agents can read, navigate, and reason over technical content effectively. Learn more at gitbook.com.
## Querying This Documentation
If you need additional information that is not directly available in this page, you can query the documentation dynamically by asking a question.
Perform an HTTP GET request on the current page URL with the `ask` query parameter, and the optional `goal` query parameter:
```
GET https://docs.enclaive.cloud/vault/tutorials/use-cases/github-actions.md?ask=&goal=
```
`ask` is the immediate question: it should be specific, self-contained, and written in natural language.
`goal` is optional and describes the broader end goal you are ultimately trying to accomplish on behalf of the user. GitBook uses it to tailor the answer towards what is most useful for that goal.
The response will contain a direct answer to the question and relevant excerpts and sources from the documentation.
Use this mechanism when the answer is not explicitly present in the current page, you need clarification or additional context, or you want to retrieve related documentation sections.
5. View the contents of the `app_secret` file in the Docker image.
```shell-session
$ docker run vault-action-exampleapp /bin/bash -c "cat ./app_secret"
SecretProvidedByVault
```
The results display the Vault secret defined at the path `secret/data/ci`. The application, and other services within this Docker image can use the secret.
---
# Agent Instructions
This documentation is published with GitBook. GitBook is the documentation platform designed so that both humans and AI agents can read, navigate, and reason over technical content effectively. Learn more at gitbook.com.
## Querying This Documentation
If you need additional information that is not directly available in this page, you can query the documentation dynamically by asking a question.
Perform an HTTP GET request on the current page URL with the `ask` query parameter, and the optional `goal` query parameter:
```
GET https://docs.enclaive.cloud/vault/tutorials/use-cases/github-actions.md?ask=&goal=
```
`ask` is the immediate question: it should be specific, self-contained, and written in natural language.
`goal` is optional and describes the broader end goal you are ultimately trying to accomplish on behalf of the user. GitBook uses it to tailor the answer towards what is most useful for that goal.
The response will contain a direct answer to the question and relevant excerpts and sources from the documentation.
Use this mechanism when the answer is not explicitly present in the current page, you need clarification or additional context, or you want to retrieve related documentation sections.